Playbook5 min read
Script Ready but Camera-Shy? Make a Digital Human Talking Video with WorkBuddy + Yihook
Connect Yihook in WorkBuddy, choose a voice for your photo and script, review the dubbing and motion settings, then generate and check a digital human talking video.
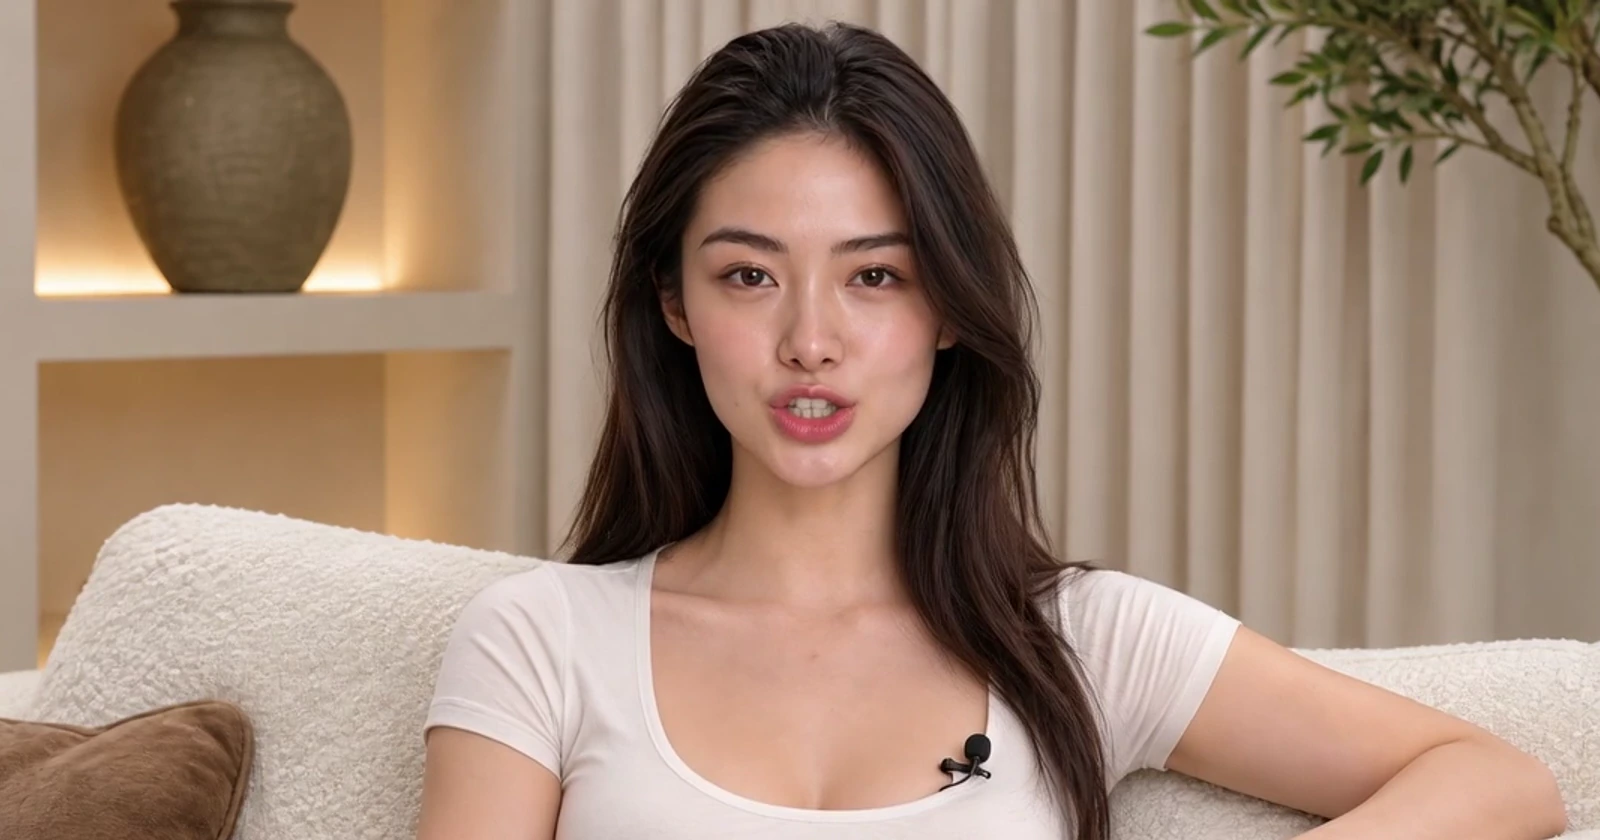
If you are a content creator, you may have encountered this situation:
You have your topic planned and your script finished, but the video remains unfilmed.
Finding camera angles, adjusting lighting, memorizing lines—and halfway through recording, a single flubbed sentence means starting all over again. With weekly release schedules, filming alone consumes a considerable amount of time.
By using the Yihook connector in WorkBuddy, you can create a short digital human talking video in about five minutes. In the video below, the first half showcases the result, followed by a complete walkthrough of the process.
Note: The demonstration video features the Chinese interface and Chinese voiceover.
You can first observe the facial expressions, lip synchronization, and movements to decide whether this approach fits your content.
If you would like to try it, the steps and prompts are detailed below.
Step 1: Prepare a Photo and a Script
This walkthrough uses the "photo + text-to-speech" workflow. Prepare the following:
- A portrait photo of yourself or an authorized portrait.
- A script of what you want to say.
- WorkBuddy, along with a Yihook account to connect.
For your first attempt, we recommend choosing a short piece of content: a reading takeaway, a workplace tip, or a brief AI tool review. Try a single short video first before moving on to longer formats.
Step 2: Connect Yihook in WorkBuddy
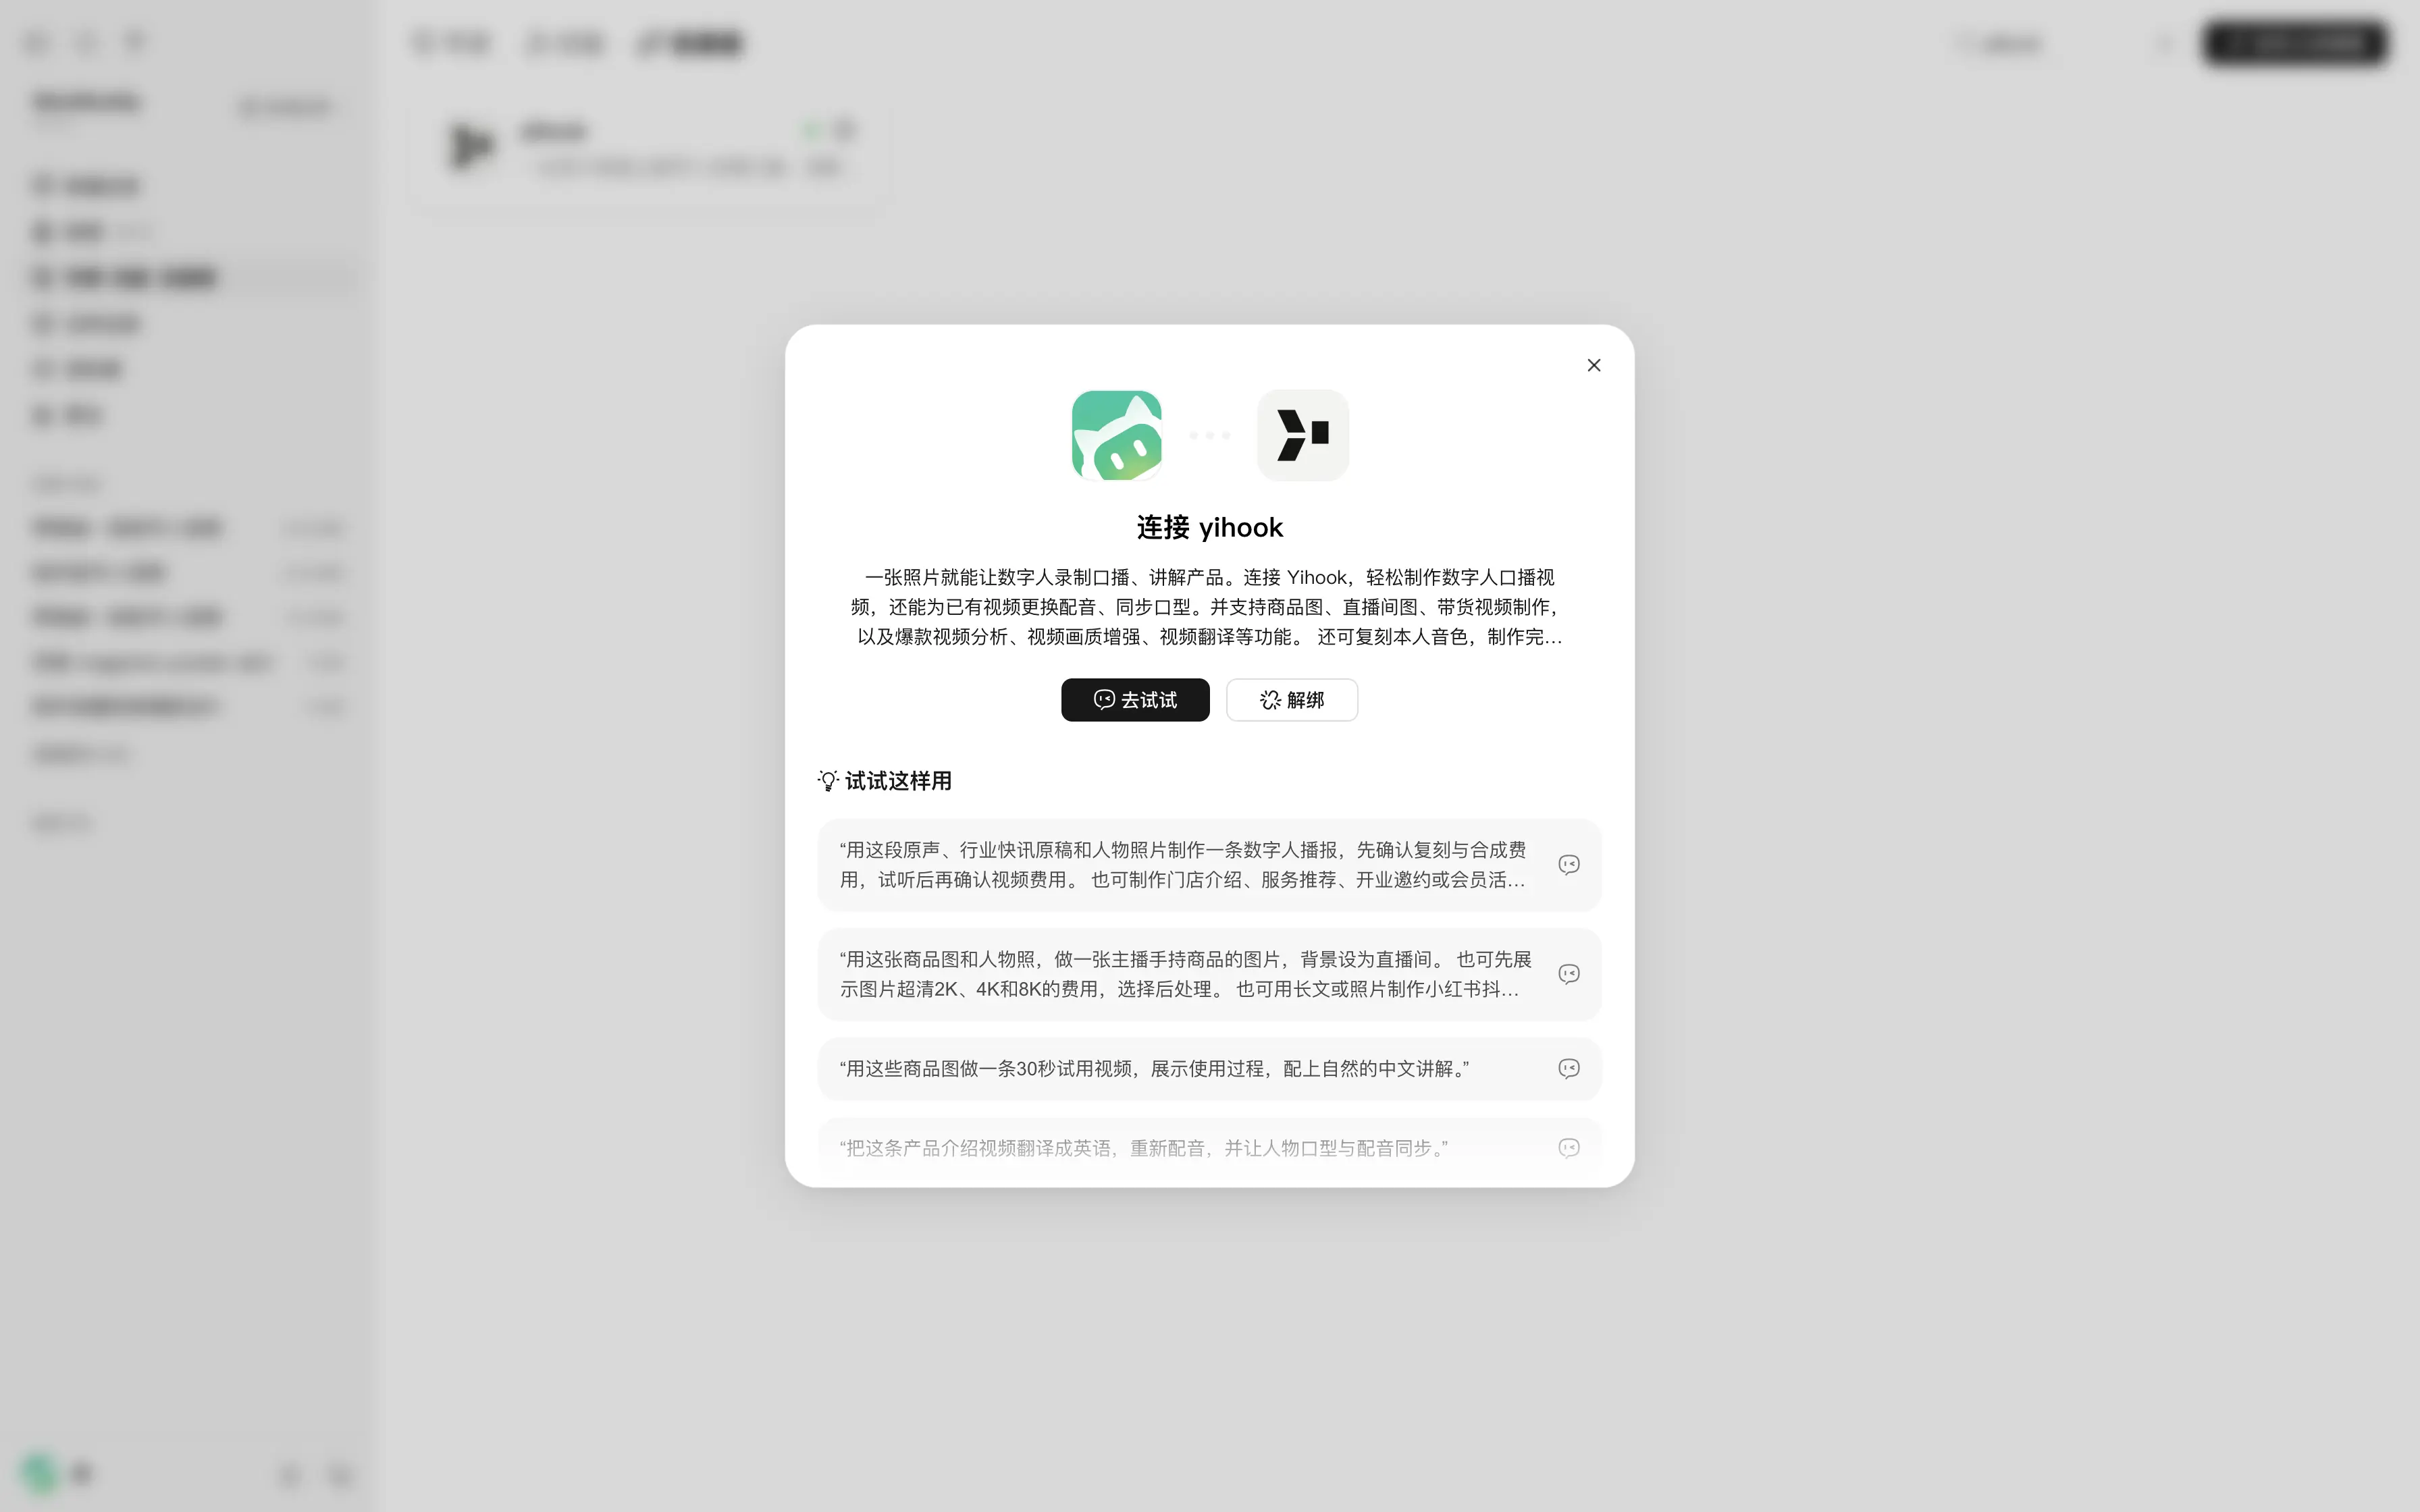
Open WorkBuddy, navigate to Experts · Skills · Connectors (“专家·技能·连接器”) on the left sidebar, switch to the Connectors (“连接器”) tab, and search for Yihook.

Click the Yihook card, then click Connect (“连接”). You will be redirected to the authorization page.
Follow the prompts on the redirected page to register or sign in to your account, and confirm authorization.
Once completed, return to WorkBuddy. After confirming that the connection is successful, click Try It (“去试试”) to get started.
Step 3: Upload the Photo and Send Your Request
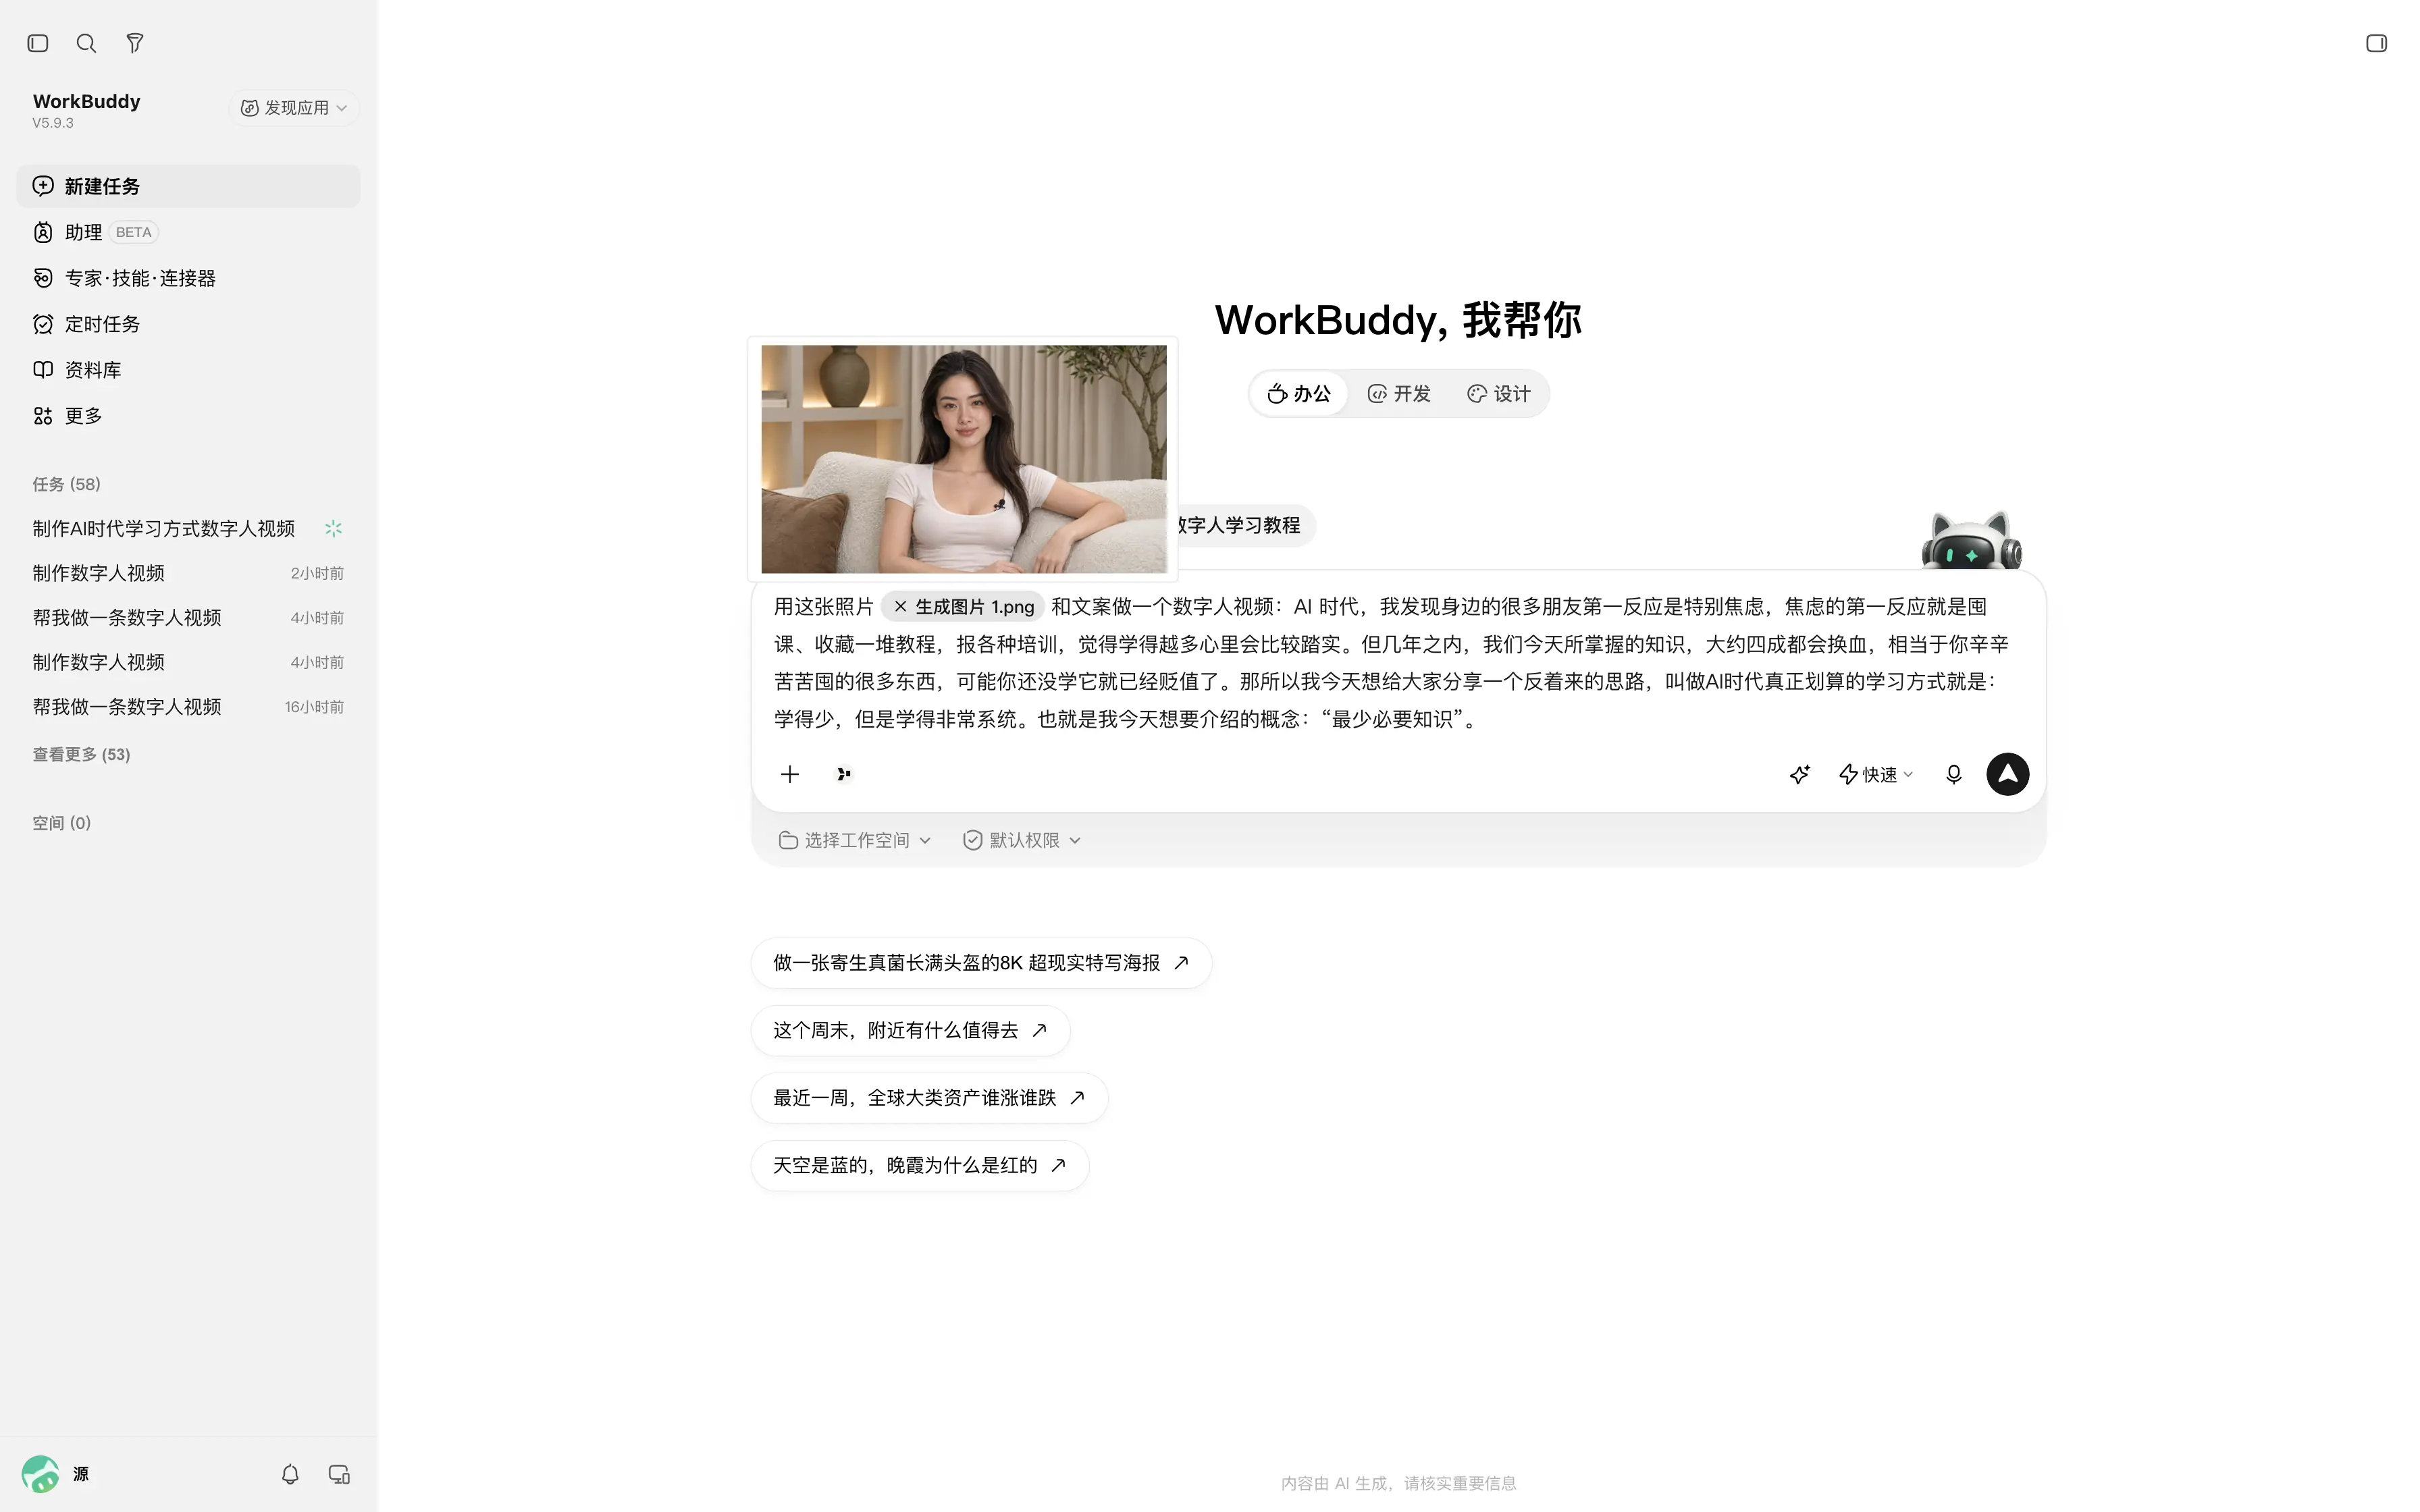
Create a new chat. Without needing to adjust complex parameters beforehand, you can simply send a prompt like this:
Create a digital human video using this photo and script: [Paste your script here]
用这张照片和文案做一个数字人视频:[粘贴你的文案]
Upload your photo, replace the bracketed placeholder with your own script, and send the message.
Step 4: Select a Voice and Preview the Script Audio
Based on the photo and script, the assistant will recommend three voice options. Listen to the audio samples first and select a voice that suits your content.
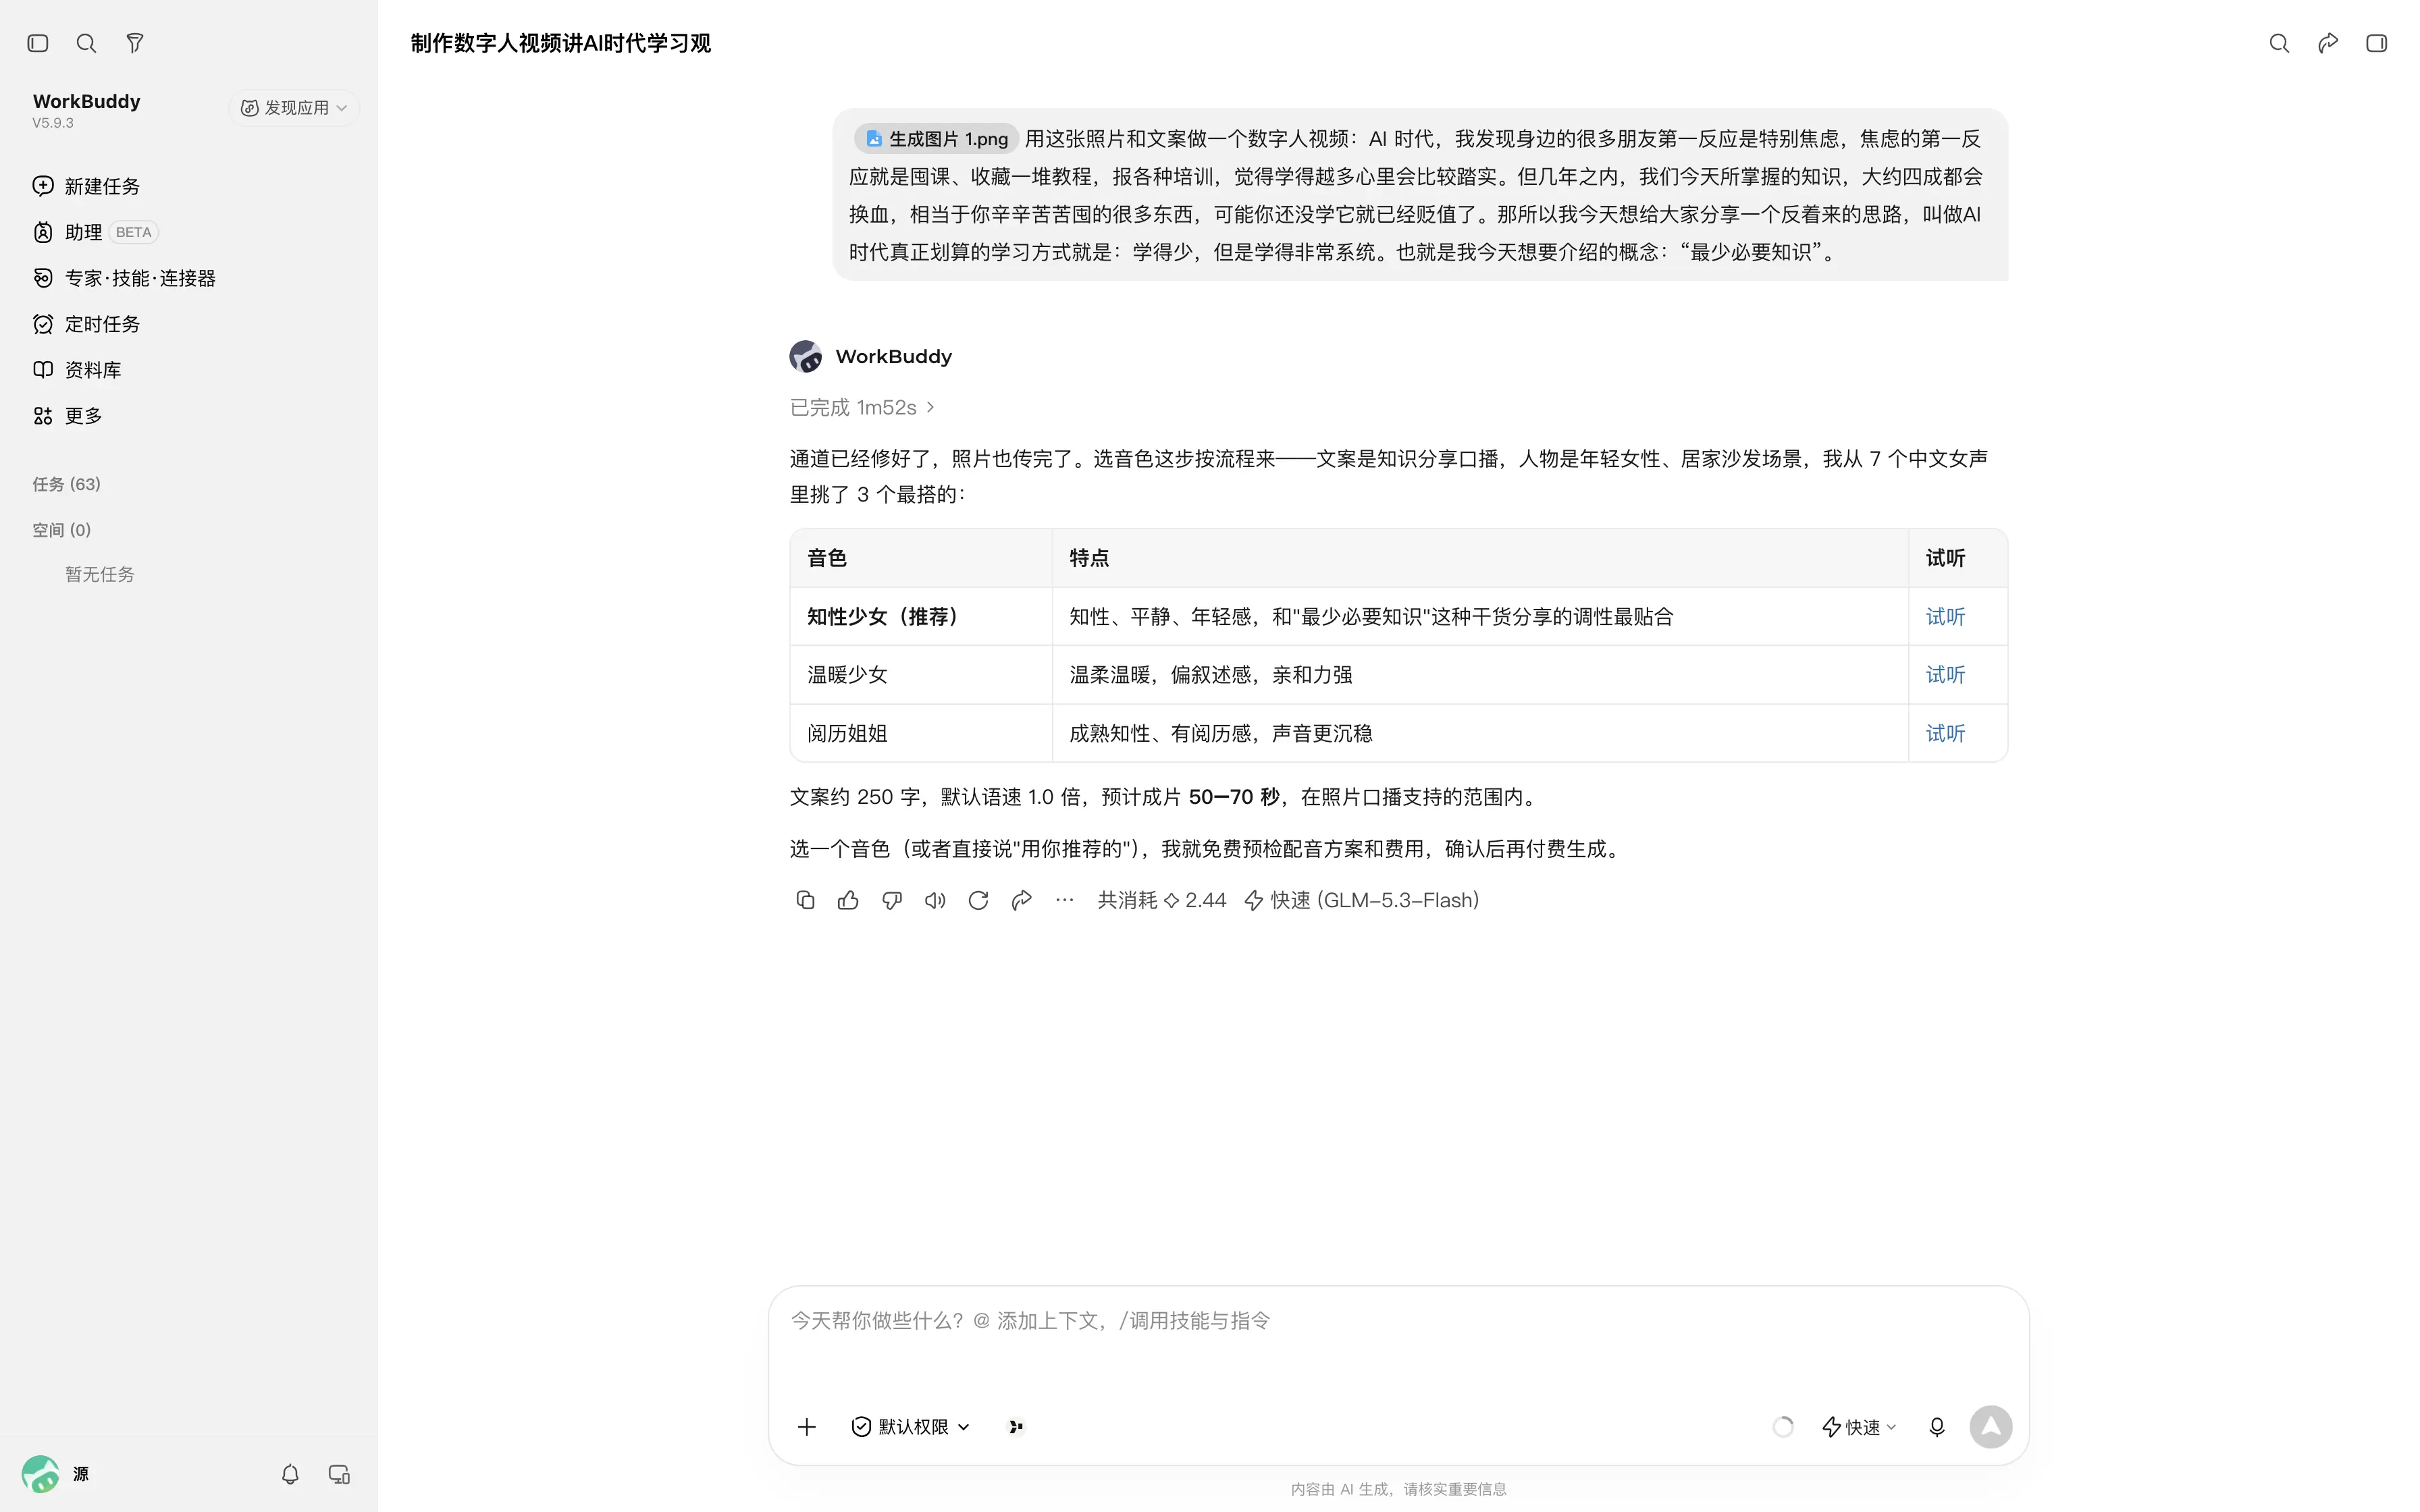
Once selected, it will prepare a voiceover plan outlining the script text, speech rate, estimated duration, and voiceover cost. If everything looks good, reply:
Confirmed. Start voiceover generation.
确认,开始配音。
After the voiceover is generated, listen to the entire audio track: check whether your text is pronounced accurately and whether the pacing feels natural. Pay special attention to proper names, numbers, acronyms, and pauses between sentences. Finalizing the audio before generating the video avoids having to redo the video later due to audio errors.
If you already have your own audio recording, you can also upload it directly and specify:
Create a digital human talking video with this photo, and directly use the audio recording I uploaded.
用这张照片制作数字人口播,直接使用我上传的这段录音。
If you prefer to have your own voice read the new script, you can upload a sample of your voice and request that it clone your voice to read the new text.
Text-to-speech, uploading your own recording, or voice cloning—choose whichever of the three workflows works best for you.
Step 5: Set Motion Preferences and Confirm Video Generation
Once the voiceover is complete, you can also configure the digital human's movements and facial expressions.
For informational or educational talking videos, you can start with a simple description:
Keep the subject focused and calm with restrained head movement, use subtle hand gestures to support the explanation, and maintain the original framing.
人物神情专注平和,头部动作克制,用小幅手势辅助讲解,保持原有构图。
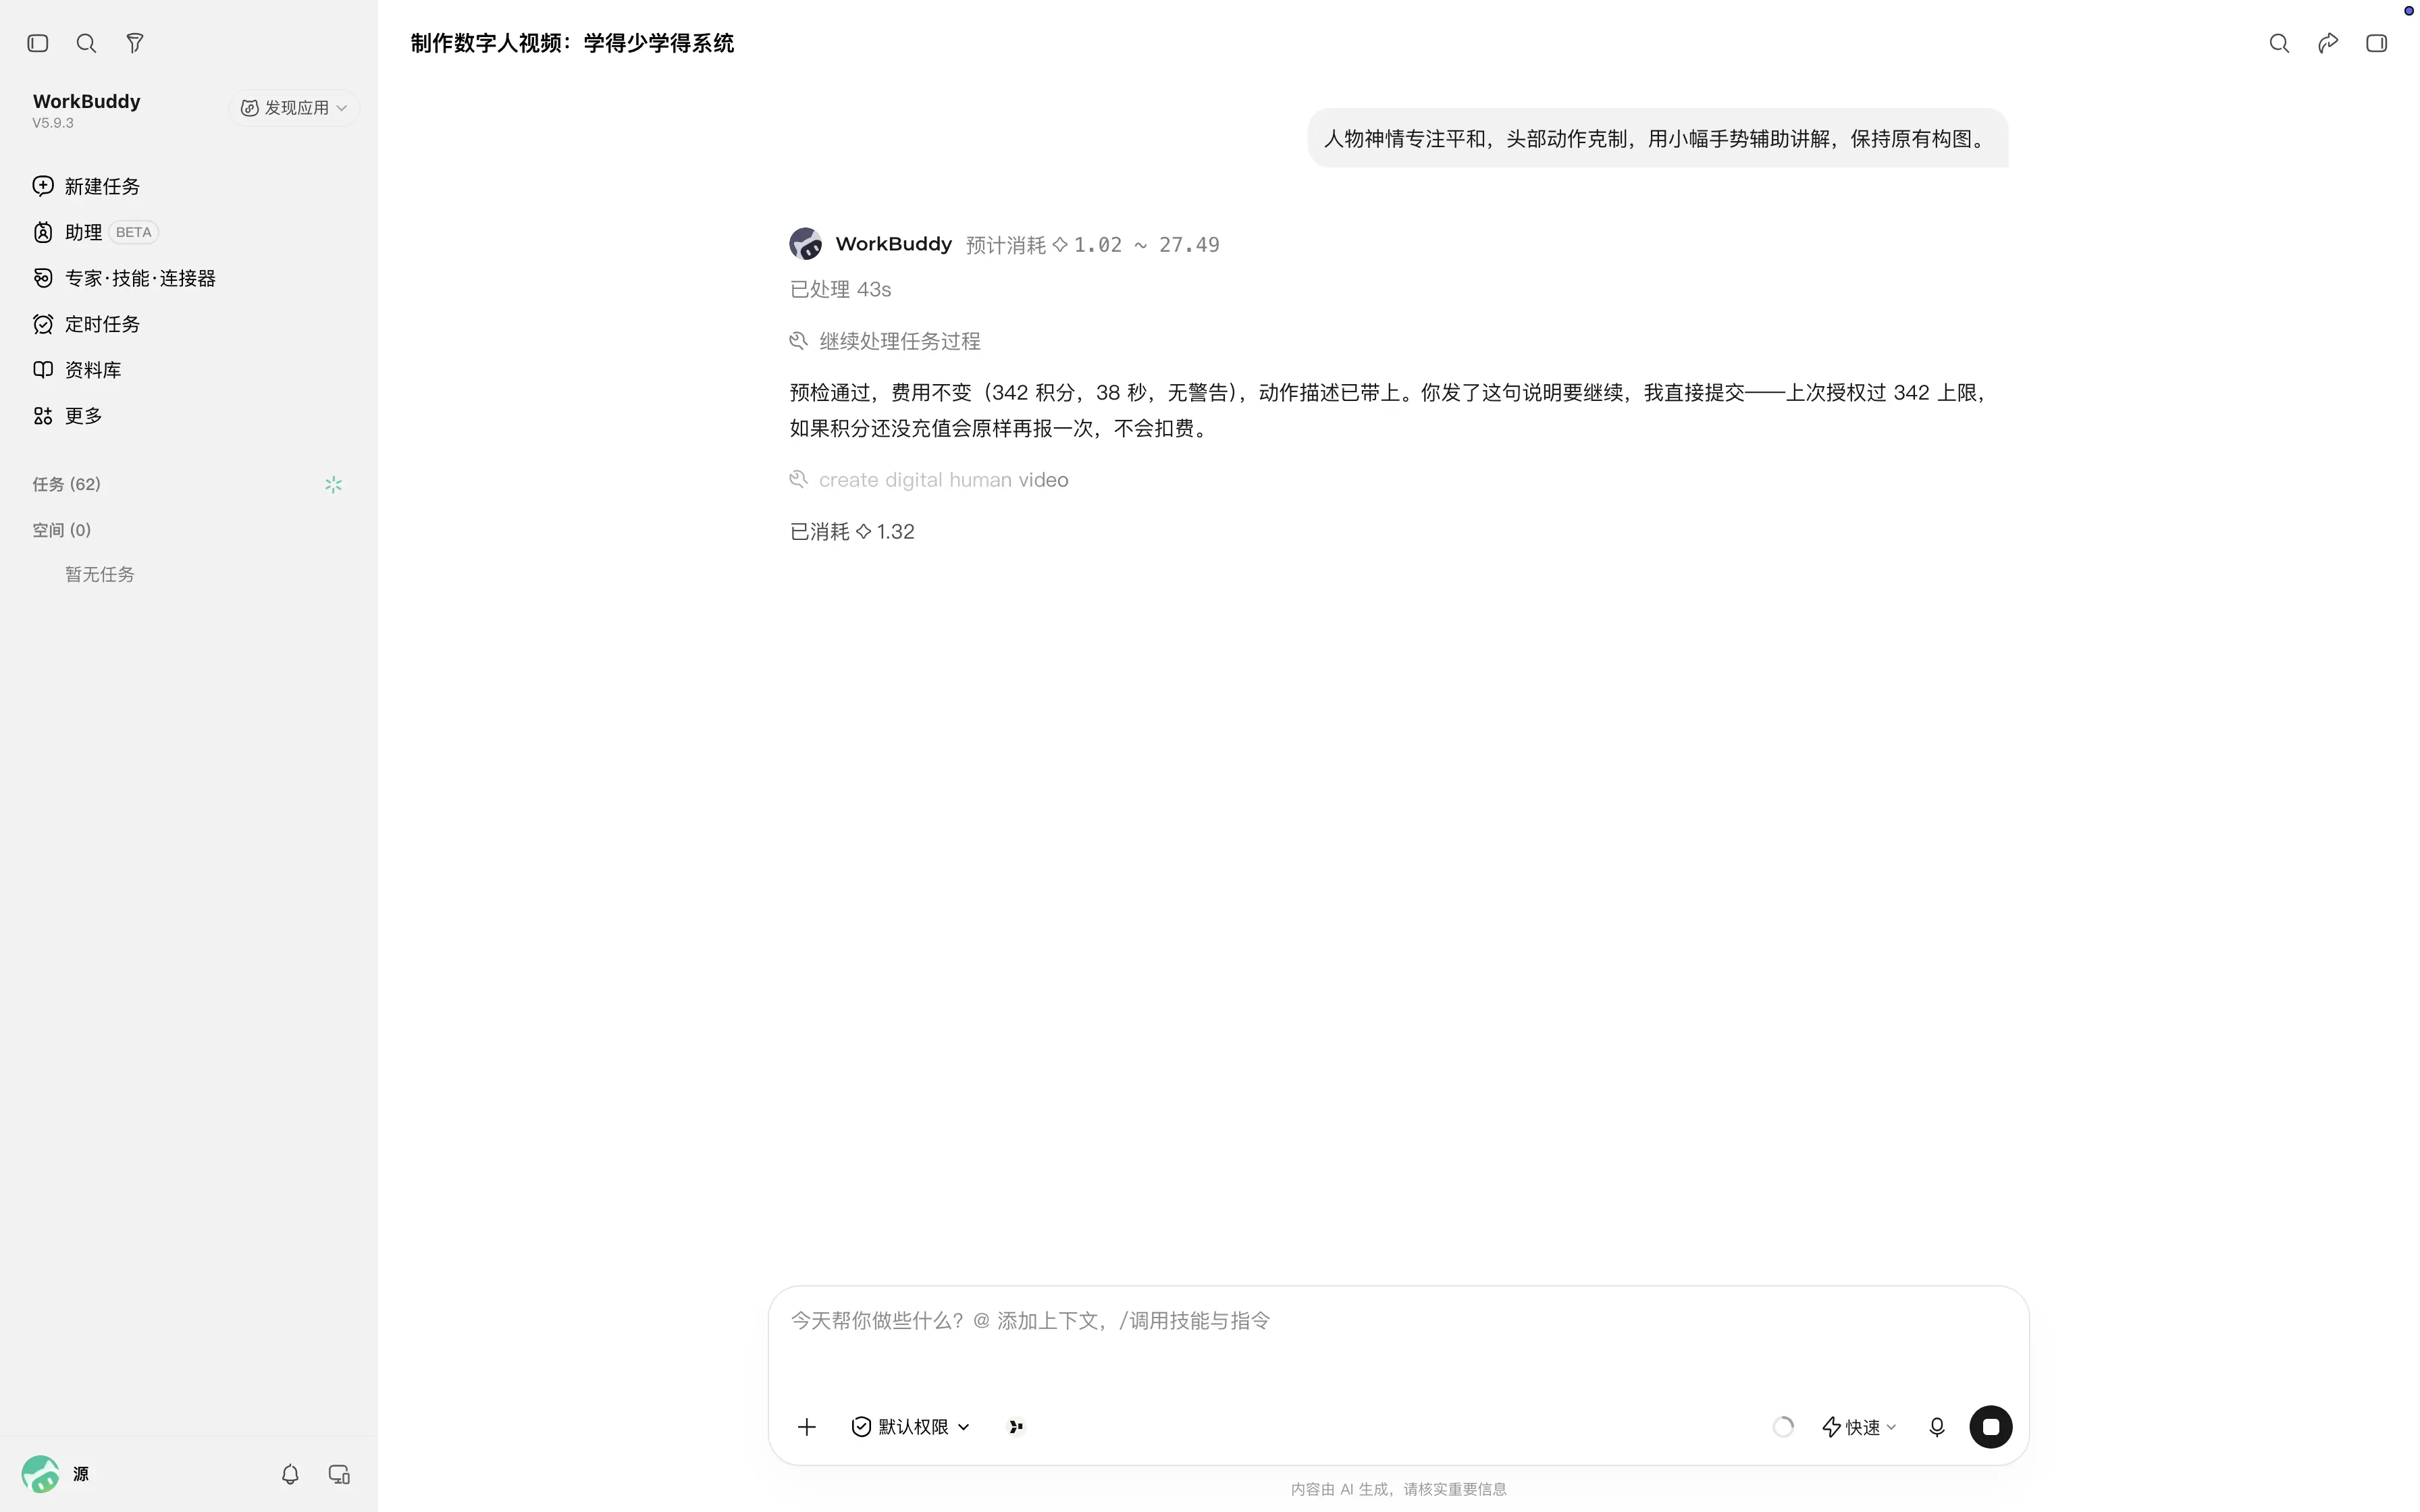
You can also leave the settings at their defaults without adjusting every parameter. The motion description guides the performance; the exact result will be seen in the final render.
Once you are satisfied with the voiceover and your motion requirements are clear, review the video generation plan and cost quote, then reply:
Confirmed. Generate video.
确认生成视频。
Then, simply wait for the task to finish.
Step 6: Preview the Video, Review, and Download
When the video is complete, you can preview and download it directly from the results.
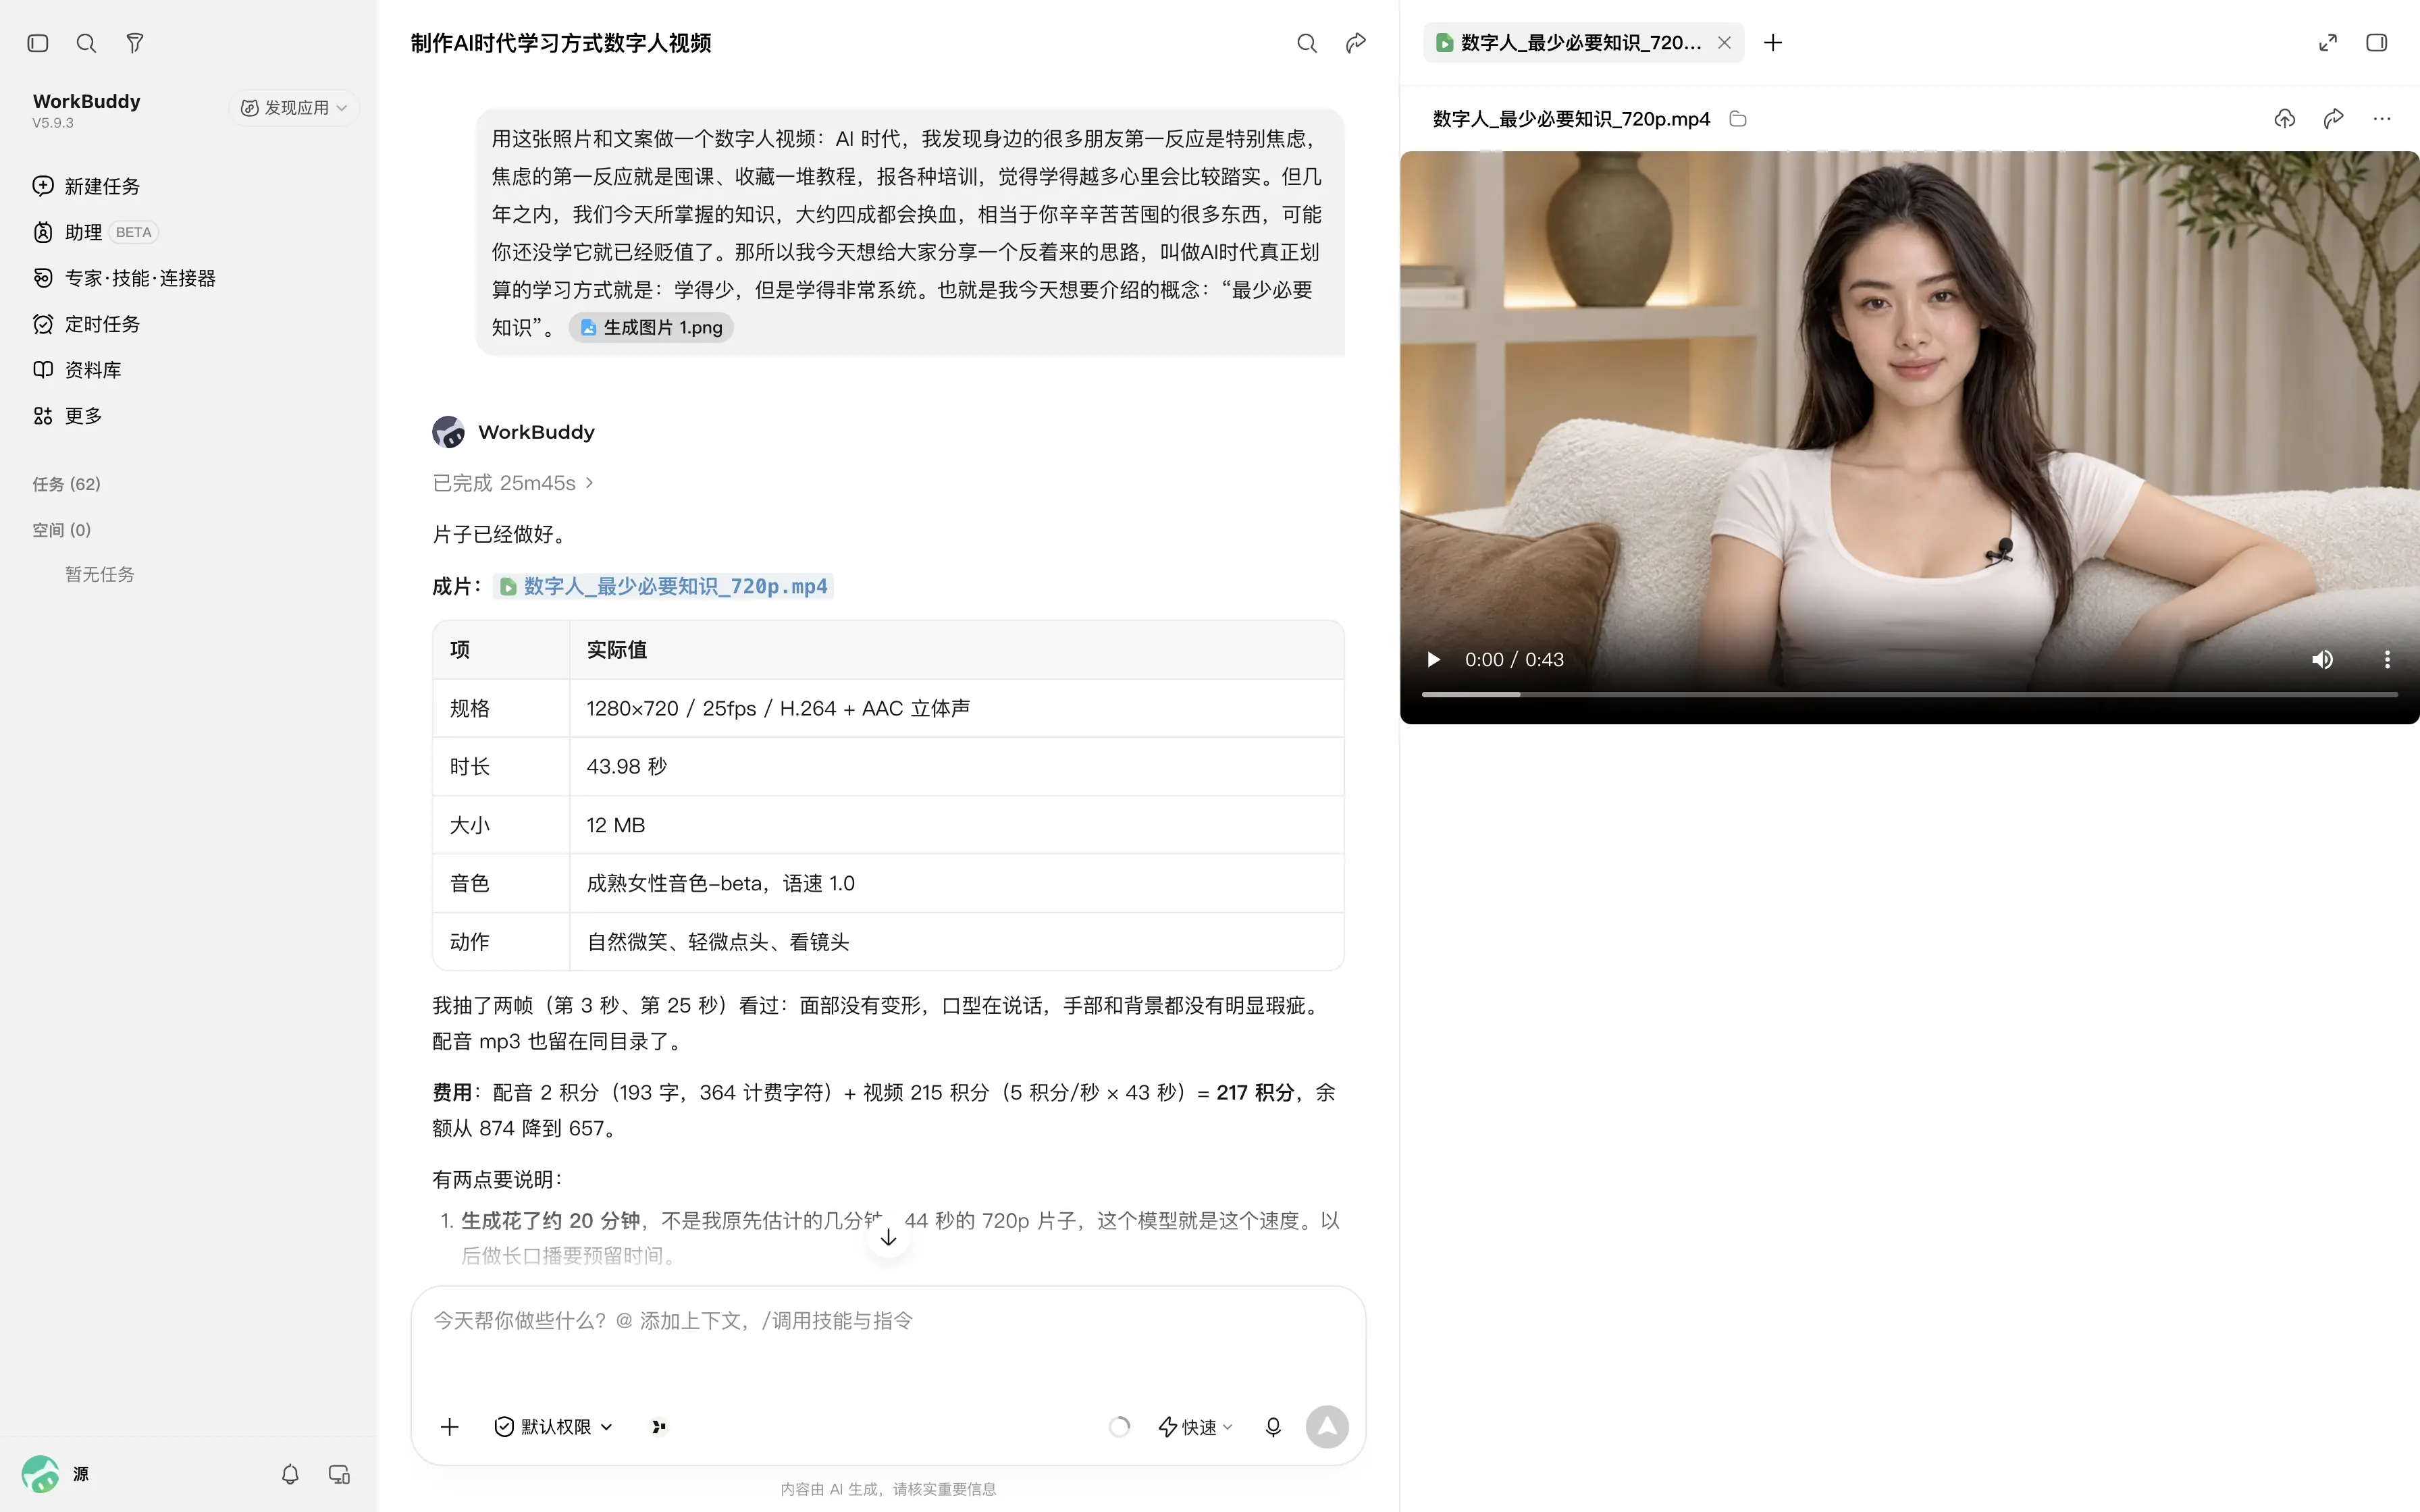
Before publishing, watch it through completely and check:
- Whether any content was mispronounced, missed, or cut off.
- Whether the audio and lip synchronization are aligned.
- Whether expressions, head movements, and hand gestures appear natural.
The digital human talking video demonstrated in this guide is now complete. If you want to create a tutorial video, you can resize the digital human into a picture-in-picture window alongside a software screencast, just like in the demo video. Screen recording, PIP layout editing, and subtitles are post-production steps that are handled separately.
Start with a Script You Already Have
For creators who need to publish regularly, the burden of video production often comes from repetitive friction: setting up cameras, adjusting energy levels, memorizing scripts, and re-recording after mistakes. Repeating this several times a week consumes significant time and energy.
By delegating these repetitive tasks to Yihook, you can redirect your saved energy toward refining arguments, adding examples, and answering questions your audience truly cares about. This reduces the filming burden of consistent publishing and leaves more time for the content itself.
Take a script you have already written and haven't had time to film, and create your first digital human video using Yihook in WorkBuddy.

Ready to try it?
Put this playbook to workon your next piece.
Every prompt and workflow above runs as-is on the Yihook canvas. Start from a product shot or an idea, make the visuals and videos, and keep what works for your team.